Context Free/CFDG is good at creating stand-alone shapes, but shapes that that need to repeat in the X and Y directions can be hard. If the shapes do not overlap themselves or if the overlapping parts are all the same color then it is possible to take a stand-alone shape and manipulate it in a bitmap editor to produce the tiled overlapping that is needed for the bitmap to be seamlessly repeated. If the overlapping parts are not all the same color then it is not possible to make a shape repeating using a bitmap editor because some component primitive shapes need to be drawn on top of others and all of the primitive shape information is lost when a cfdg file is saved as a bitmap.
The CF::Tile Declaration
Adding a CF::Tile configuration declaration to a cfdg file makes it a tiled cfdg shape. Each shape is drawn not just at one point, but at all points on a tiling lattice. The shape adjustment assigned to CF::Tile is used to transform the tiling lattice. The default tiling lattice is a 1x1 square lattice. The transformed tiling lattice can be a larger or smaller square lattice, or a rectangular lattice, or a rhombic or parallelogrammic lattice. The only restriction on the transformed tiling lattice is that one of the lattice axes must be on the x or y axis. This generally means that rotation adjustments are out and skew adjustments must only skew x or y, but not both. However, the easiest way to specify a rhombic lattice is to skew x and y and then rotate the lattice back to the x or y axis. Here is how a hexagonal (rhombic) lattice is specified:
CF::Tile = [skew 15 15 r 15] // or [skew 15 15 r -15]
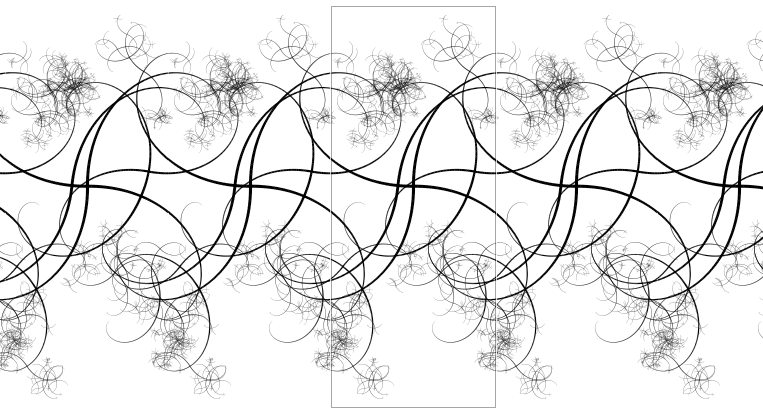
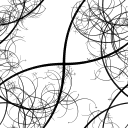
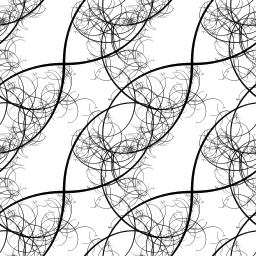
If we want to take the tangle.cfdg file included in the examples and make a tiled version we would write:
startshape SPIKES
CF::Tile = [s 60]
import tangle.cfdg
The s 60 in the CF::Tile configuration declaration shape adjustment expands the tiling lattice from 1x1 units to 60x60 units. Since tangle.cfdg tends to be about 120x120 units this causes about a 50% self-overlap. If you replicate this image you see that it seamlessly tiles the plane.
The CF::Tile configuration declaration changes the rendering process in two ways:
- It fixes the scale of the output such that exactly one unit of the tiling lattice fits into the rendering canvas.
- It draws a copy of the shape at each point of the tiling lattice. The tiling lattice is infinite in extent, but only pixels that fit into the drawing canvas are drawn. The canvas is cropped so that its aspect ratio matches the aspect ratio of the tiling lattice.
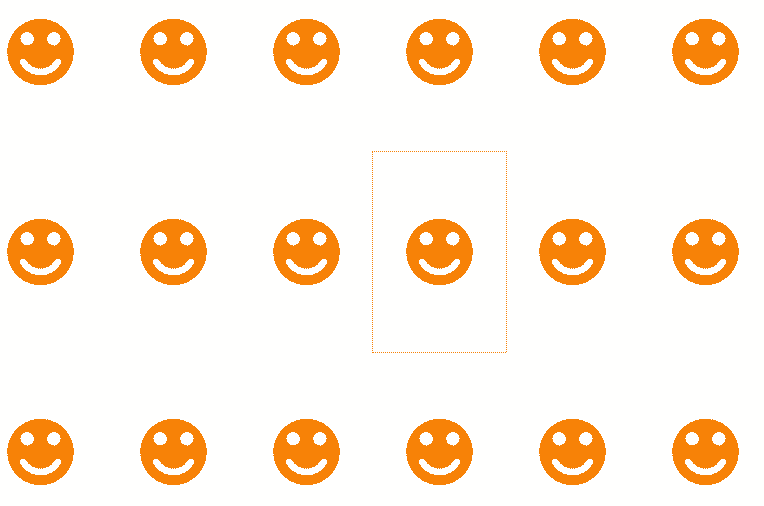
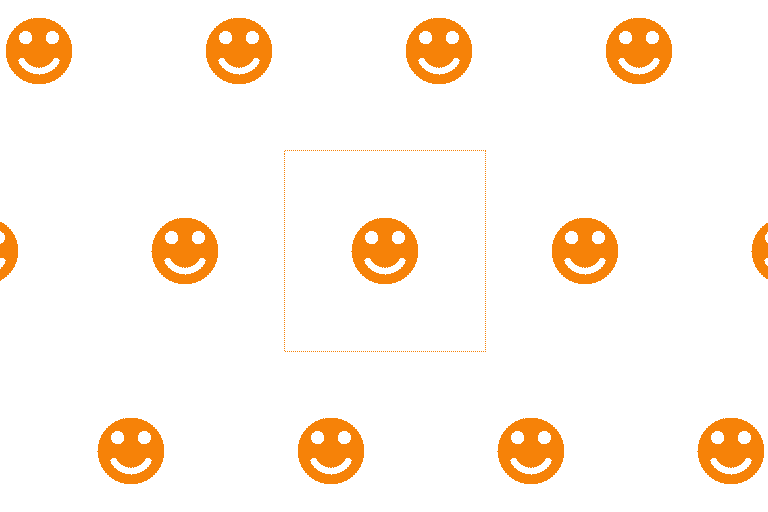
Tiling Lattice
The default tiling lattice has unit vertical and horizontal spacing.
startshape smiley

CF::Tile = []

path smiley {
  path CIRCLE[]
  FILL[b 1 sat 1 h 25]
  path CIRCLE[s 0.2 y 0.2 x -0.2]
  path CIRCLE[s 0.2 y 0.2 x 0.2]
  FILL[b 1]
  rad = 0.3
  ang = 60
  MOVETO(rad*cos(270-ang), rad*sin(270-ang))
  ARCTO(rad*cos(270+ang), rad*sin(270+ang), rad)
  STROKE(CF::RoundCap)[b 1]
}

Scaling the tiling lattice appears to shrink the design, but really the tiling lattice is expanding.
import smiley.cfdg
CF::Tile = [s 3]

Anisotropic scaling produces a rectangular tiling lattice:
import smiley.cfdg
CF::Tile = [s 2 3]
Skewing the tiling lattice produces a parallelogrammic tiling lattice:
import smiley.cfdg
CF::Tile = [s 3 skew 15 0]
Skewing and rotating the tiling lattice produces a rhombic tiling lattice:
import smiley.cfdg
CF::Tile = [skew 15 15 r -15 s 0.965]

Frieze Tiling
It is possible to specify a one-dimensional tiling lattice (see Frieze group). A frieze tiling will repeat seamlessly horizontally or vertically. A horizontal frieze tiling will be dynamically scaled vertically, but have fixed scale horizontally. A vertical frieze tiling will be dynamically scaled horizontally, but have fixed scale vertically. To specify a frieze tiling you set one of the tiling lattice dimensions to zero (but not both):
CF::Tile = [s 60 0]  // Tile horizontally only
// or
CF::Tile = [s 0 60]  // Tile vertically only
startshape SPIKES
CF::Tile = [s 60 0]
import tangle.cfdg